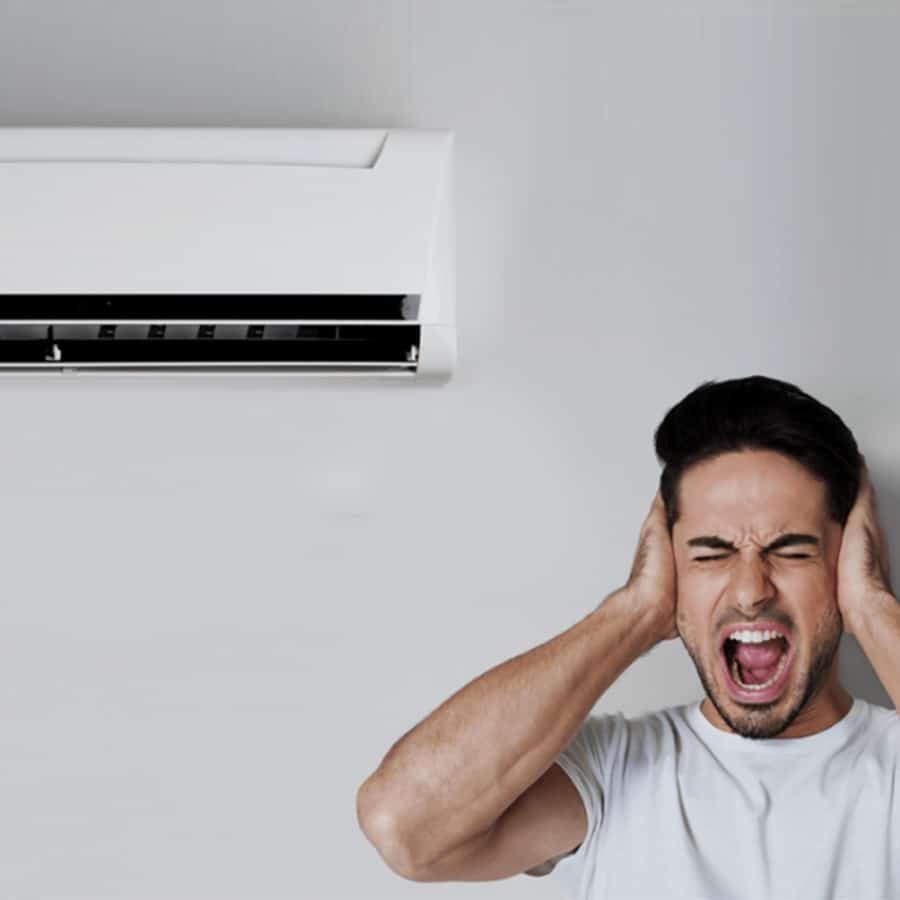
Ever been startled by a hissing sound from your air conditioning unit? This could be an issue with your air conditioners or the entire AC installation not properly distributing cool air. It’s not just an annoying background noise. This hissing sound or buzzing noise could be a sign of underlying issues with your vents that, if ignored, may increase the risk of costly repairs or even health hazards. Understanding what causes these hissing noises from your air conditioners is crucial – it’s more than just a part of your air conditioning unit acting up for a few seconds. These sounds could indicate an issue with your air conditioning system. In most cases, hissing noises are an indication that there’s a problem with the operation your air conditioning system should be performing, requiring a technician.

Reasons Behind Hissing Sound from AC

To comprehend the hissing noise from your AC, let’s delve into the role of internal pressure imbalances, refrigerant leaks, malfunctioning components, and leaking air ducts. It’s also essential to consider the temperature fluctuations, technician’s role in maintenance, the line of airflow, and the function of vents.

Internal Pressure Imbalances

AC Installation technicians design air conditioning systems, including the air conditioner and vents, to maintain a specific internal pressure. When the balance in your air conditioning system is disrupted, it can result in a hissing sound from the vents or air conditioner line. Think of it like a balloon on the line, filled with too much air; eventually, it has to release some of that air to avoid popping. In the same way, your air conditioning system, specifically your AC unit or air conditioner, might make a hissing noise as it tries to equalize its internal pressure.

Refrigerant Leaks

Refrigerant leaks in your air conditioner or air conditioning system are another common cause for that pesky hissing sound. The refrigerant is basically the lifeblood of your AC system—it absorbs heat from your home and cools down the air before pumping it back out. If there’s a leak in the fluid line of your air conditioning system, you’ll likely hear a hissing or bubbling noise as the refrigerant from the air conditioner escapes under high pressure.

Malfunctioning Components

If certain parts of your air conditioner aren’t functioning as they should—like the valves or compressors—you might hear unusual noises, including a hissing sound. It’s like when you’re driving your car and suddenly hear an odd clunk or squeak; something is off-kilter and needs to be fixed.

Leaking Air Ducts

Lastly, let’s talk about leaking air ducts—a sneaky reason behind that annoying hissing sound. Your AC, a crucial part of your Heating & Cooling system, pushes cool air through these ducts into various rooms in your house, demonstrating the importance of efficient Cooling Services. If there’s a leak somewhere along these paths—say due to poor installation or wear and tear—the escaping air can create a whistling or hissing noise.

Role of Leaking Air Ducts

Leaking air ducts can be a major culprit when you hear a hissing sound from your AC. Let’s dive into how these leaks come about and the impact they have on your comfort and energy bills.

The Hissing Sound Explained

Air ducts are like the lungs of your AC system, circulating cool air throughout your space. Now imagine if there’s a hole in them. Air would escape through these leaks, producing a hissing noise as it does. It’s kind of like when you let air out of a balloon slowly; that squeaky noise is similar to what happens with leaking ductwork.

Size Matters

The intensity of the hissing sound depends on the size and location of the leak in the air ducts. If you’ve got small leaks scattered around, it might just sound like your AC is whispering secrets to itself. But larger leaks? Oh boy, they’re like someone blowing through a flute!

Material Influence

Duct material also plays its part in this concert. Metal ducts produce sharper sounds compared to their plastic counterparts which tend to muffle the noise somewhat. So if your house sounds like an orchestra warming up every time you turn on the AC, you might want to check what type of air ducts you have installed.

Energy Efficiency Takes A Hit

Leaky air ducts don’t just make irritating noises; they also hit where it hurts most – your wallet! When conditioned air escapes through these gaps, your AC has to work overtime to maintain comfortable temperatures indoors. Duct Cleaning, IAQ Improvement, and Moisture Control can help address this issue. This extra effort means higher energy consumption and consequently steeper utility bills.

So next time when you hear a hissing sound from your ac, don’t ignore it as just another weird noise in the house. Your leaking air ducts could be signaling for some much-needed Heating Repair and IAQ Improvement TLC (Tender Loving Care). Get them inspected and sealed properly for optimal moisture control, performance, and protection from damage.

Compressor Pressure Impact on AC Noise

Summing up, the compressor pressure in your AC has a significant role in its operation. This pressure state can be linked to the noises you hear, affects indoor air quality, cooling performance, and safety.

Understanding How Compressor Pressure Affects AC Operation

Your air conditioner’s heart is the compressor. It’s like a big pump, circulating refrigerant around your system and aiding in air purification. The pressure state of this compressor dictates how efficiently it does its job.

  • High pressure: Your compressor works overtime.
  • Low pressure: It might not work hard enough.

Either way, you’re looking at an unhappy AC unit.

Ever heard a hissing sound from your AC? That could be due to high compressor pressure. Here’s why:

  1. More refrigerant gets pushed through smaller spaces.
  2. This causes vibration and noise.
  3. The result? You get that annoying hissing sound.

So, high-pressure states aren’t just bad for efficiency – they’re noisy too!

Effects on Cooling Performance Due to Altered Compressor Pressure

It’s not just about noise though; altered compressor pressures impact your AC’s cooling performance as well:

  • Under too much pressure, your Cooling Tech system works harder but provides less effective Cooling Solutions. This is a common issue with outdated Cooling Innovations.
  • Too little pressure: Your system doesn’t cool enough because it isn’t working hard enough.

In other words, if your home feels more like a sauna than an oasis, check your compressor pressure! These heating tips can improve your indoor air quality.

Safety Risks Associated with Excessive Compressor Pressure

Now let’s talk safety because excessive compressor pressure isn’t just inefficient and noisy—it can also be dangerous:

  • Overworked compressors generate heat which can cause parts to fail.
  • Failed parts can lead to leaks or even fires (worst-case scenario).

Remember folks, we want our homes chill—not chilled by fear of potential hazards!

Connection Between Refrigerant Leaks and Hissing

Refrigerant leaks can cause a hissing noise from your AC. Not only do these leaks affect the smooth operation of your system, but they can also lead to long-term damage and have environmental impacts.

The Role of Refrigerant in Your AC

The refrigerant is the lifeblood of your air conditioner. It’s what keeps you cool when it’s hot outside. When there are proper refrigerant levels, your AC runs smoothly like a well-oiled machine. But if there’s a leak, things start going south real quick.

  • Low refrigerant levels make your AC work harder than it should, similar to a furnace in a bedroom closet.
  • This can result in overheating and potential damage to the compressor.
  • A leaky condenser or damaged refrigerant lines could be the culprits.

The Hissing Sound Explained

Ever heard that annoying hissing sound coming from your AC? Get some HVAC advice and consider air purification. That could be due to a refrigerant leak. Here’s how:

  • The high pressure in the refrigerant lines can force gas out through cracks or gaps.
  • This escape of gas creates that hissing sound you hear.

It’s not just about annoying noises though; this is a sign something ain’t right with your cooling buddy!

Potential Damage Over Time

Unchecked refrigerant leaks aren’t just noisy; they’re harmful too. They can cause some serious damage over time.

  • Continuous leakage leads to low pressure in the system.
  • This makes the compressor work overtime, leading to possible burnout.
  • In worst-case scenarios, it might even need replacement – now that’s an expense nobody wants!

Environmental Impact

Besides causing operational issues and potential damage, refrigerant leaks also have environmental implications. These gases aren’t exactly eco-friendly.

  • Most air conditioners use hydrofluorocarbons (HFCs) as a refrigerant gas.
  • If leaked into the atmosphere, these gases contribute to global warming.
  • In fact, some types of refrigerant gas have a global warming potential thousands of times greater than carbon dioxide.

So, next time you hear that hissing sound from your AC, don’t just ignore it. The pros and cons aren’t just about your comfort or the potential repair costs. It’s also about doing our bit for Mother Earth.

Heat Pump Valve Malfunction & AC Hissing

The Role of Heat Pump Valves in Your HVAC System

Heat pump valves, vital to your HVAC system, are a key part of our Heater Services and Heating Services. Dehumidifiers control the flow of refrigerant, ensuring it’s moving in the right direction.

These valves, particularly the expansion valve, are like traffic cops for your HVAC system. Heating & Cooling systems direct the flow of refrigerant – that cool stuff that keeps your home chill with cooling solutions during those hot summer days and warm when winter rolls around. Dehumidifiers and clean air ducts also play a key role in this process.

The Soundtrack of a Malfunctioning Valve

Now imagine if our traffic cop goes rogue and starts directing cars haphazardly. Chaos, right? That’s exactly what happens when your heat pump valves malfunction.

The result is an abnormal hissing or gurgling sound from your AC unit. It’s like hearing a snake slithering inside your HVAC system! Creepy, huh?

Impact on Heating and Cooling Capabilities

When these valves go haywire, they don’t just make weird noises. They can seriously mess with your heating and cooling capabilities too.

Think about it: if the refrigerant isn’t flowing properly, how can you expect to get proper heating or cooling? It’s like trying to bake a cake without turning on the oven!

Timely Repair Is Key

Just as you wouldn’t wait to fix a leaky faucet, you shouldn’t ignore a malfunctioning valve either. The longer you wait to repair or replace it, the worse things can get.

Express HVAC services and furnace repair specialists will tell you this: A faulty valve today could mean a completely busted AC or the need for a furnace fix tomorrow. Always be aware of furnace replacement signs. So act fast!

When to Consult Professionals for AC Noise

Sometimes, a DIY fix isn’t enough for that pesky hissing sound from your AC. Clean Air Ducts, Air Cleaners, and Duct Cleaning may be necessary. It’s crucial to recognize when it’s time to call in the 24/7 Help pros for Emergency Services.

Recognizing Insufficient DIY Troubleshooting

You’ve tried everything – you checked the valves, inspected the refrigerant lines, and even gave your AC unit a good clean. But despite all your efforts, the hissing persists.

If this sounds like your situation, it might be time to put down the toolbox and pick up the phone.

These are clear signs that professional help is needed.

Importance of Professional Diagnosis

But why go pro? Can’t persistent or loud noises just be ignored?

Well, not really. Your AC isn’t like that old car engine that runs fine despite its grunts and groans. A noisy air conditioner often indicates an underlying issue that could warrant serious AC repair if left unchecked.

A professional diagnosis can:

  • Identify hidden issues causing the noise
  • Prevent further damage to your unit
  • Ensure optimal performance of your AC system

Risks of Delaying Expert Intervention

Sure, calling in an expert might seem like a hassle (and an expense). But delaying could cost you more in the long run, a significant con to consider among the pros and cons.

Here’s what could happen if you ignore those persistent noises:

  1. Minor issues with your AC today, like a refrigerant leak, could escalate into major problems like compressor failure tomorrow, impacting the future of AC.
  2. Increased energy bills: An inefficiently running AC uses more power.
  3. Health risks: Leaking refrigerants aren’t exactly healthy for you or the environment!

Understanding Cost Implications of Repairs

Let’s talk dollars and cents now. Yes, professional repairs come with a price tag. But think of it as an investment in your comfort and health.

Depending on the issue, repair costs can vary. However, regular maintenance by professionals can prevent costly repairs down the line.

  • Regular tune-ups ensure efficient operation
  • Early detection of issues prevents expensive replacements
  • A well-maintained AC has a longer lifespan

Remember, an ounce of prevention is worth a pound of cure. It’s better to pay for minor fixes now than a major overhaul later!

Addressing a Hissing Sound from Your AC

So, you’ve navigated the labyrinth of possible causes for that irritating hissing noise from your AC, in your quest for an Air Conditioner Fix. It’s clear as day now – it could be anything from leaking air ducts to a malfunctioning heat pump valve, indicating furnace fix needs or potential furnace replacement signs. But remember, while some issues might seem minor, they can snowball into major problems if left unattended.

Don’t let yourself sweat over this! It’s high time to call in the pros and get your peace (and peace of mind) restored. Our AC Repair team will pinpoint the issue and fix it quicker than you can say “air conditioner”, providing Quick Response and IAQ Solutions for the Future of AC. So, don’t delay – reach out to a trusted professional for your Furnace Repair, Heater Services, Heating Repair, and Heating Services today.

FAQs

What causes a hissing sound in an AC unit?

The hissing sound in an AC unit could be due to several reasons such as leaking air ducts, compressor pressure impact, refrigerant leaks or even a malfunctioning heat pump valve.

Is a hissing noise from my AC dangerous?

While a hissing noise may not immediately harm your health or safety, it indicates an underlying problem with your system that could potentially lead to more serious issues if not addressed promptly.

Should I turn off my AC if it’s making a hissing noise?

Yes, it is generally recommended to turn off your AC if it starts making unusual noises like hissing. This helps prevent further damage until Emergency Services can professionally inspect the system.

How much does it cost to fix a hissing AC?

The cost of fixing a hissing AC depends on the exact cause of the problem. However, regular maintenance checks can often prevent these issues and save costs in the long run.

Can I fix a hissing AC myself?

While some minor repairs might be manageable at home, most causes of a hissing sound require professional attention due to their complexity and potential risks involved.

Did you know that 63% of millennials are considering tiny house living over a traditional home for affordability and sustainability? These compact dwellings are a great option for those looking to downsize a bit and often include eco-friendly features like water catchment systems. As these compact homes surge in popularity, the need for efficient plumbing systems, including tiny house shower installations, water supply lines, and drain pipes, becomes crucial. A DIY tiny house plumbing kit offers a blend of space-saving design and cost-effectiveness, ensuring your basics are covered from bathroom shower inlet to shower drain outlet, with a reliable drain pipe installation that even a novice plumber can manage. With simple installation steps, you can connect your trailer to a reliable water supply without the hassle, incorporating plumbing fixtures according to a tiny house plumbing diagram. Choose the right plumbing option and install a compact tiny house shower for efficient use of space. Whether it’s deciding on the right fittings for your finish plumbing or understanding rough-in diagrams for drain lines and water lines, we’ll help link you to all the resources for a successful shower drain installation—no commission necessary. Dive into our guide that simplifies assembly work for your tiny home’s plumbing needs, with easy-to-follow instructions on installing a shower drain, connecting to a water tank, and smart design tips for laying out tubing and the water line.

Understanding Tiny House Plumbing Basics

Tiny house plumbing differs from traditional systems. Planning is key for water supply and waste disposal.

Traditional vs Tiny Plumbing

Tiny homes have unique challenges. Space constraints mean every inch counts. Unlike traditional homes, tiny houses often move. This mobility demands a flexible plumbing system.

Traditional systems, including rough plumbing and finish plumbing, rely on permanent connections to water and sewer lines, as depicted in a tiny house plumbing diagram, which typically incorporates a shower drain. In contrast, tiny house plumbing must adapt to various locations and resources, including the installation of a water line, connecting a hot water heater, ensuring a functional shower, and sometimes repairing a hole in the system. Some use standard hookups like RVs with rough plumbing; others collect rainwater or connect to wells, integrating a grid plumbing system including a drain and tank.

Key Components

Pipes, PEX fittings, and a water heater with a drain hole are essential for any DIY tiny house plumbing kit installation.

Pipes carry water in and out of the home. They must withstand pressure and temperature changes. The right material—like PEX or PVC—is crucial for durability.

Fittings ensure the pipes connect securely without leaks. Elbows, tees, and couplings are common types of fittings used in pex water line systems, often installed to navigate around a hole or connect to a hot water heater.

The water heater provides hot water throughout the home. In your tiny home, size matters; it needs to fit within limited spaces while meeting your hot water needs, seamlessly integrating with your grid plumbing system and avoiding any unnecessary holes for pex installation.

Water Supply

A reliable water source is vital for any home, including tiny ones, which requires properly install PEX lines to ensure efficient drain systems.

Some opt for hookups at RV parks or campgrounds that provide access to municipal water, making it easier to install PEX plumbing and manage the drain system in a tiny home. Others may prefer self-sufficiency through rainwater collection or digging a well, incorporating a PEX drain system for efficient water use in their tiny home. Storage tanks hold fresh water until needed. Filters purify the collected or stored water before use. Regular maintenance prevents contamination and ensures consistent quality.

Waste Disposal

Waste management in tiny houses requires careful planning too.

Septic systems are one option for the water line in a tiny home, but they need space not always available and may require alternative solutions like a PEX drain. Composting toilets provide a tiny home solution that minimizes waste without the need for sewer hookups, water lines, or traditional drains, utilizing pex piping where necessary. Greywater from sinks and showers in a tiny home can be reused after proper treatment through PEX lines. Blackwater from tiny home toilets requires secure disposal through pex lines, often at designated dump stations if mobile. Properly installed pex vents prevent odors and gases from entering tiny home living spaces through the lines.

Planning Your DIY Tiny House Plumbing System

After grasping the basics of tiny house plumbing, including the use of PEX lines, it’s crucial to tailor your system to fit your unique needs and ensure it adheres to local regulations. Now, let’s delve into planning a functional and compliant DIY tiny house plumbing kit using PEX lines.

Assess Water Usage

Understanding how much water you’ll use in your tiny home is vital for sizing your PEX plumbing system and water line correctly. Estimate the daily water consumption for activities like showering, cooking, and cleaning through your home’s PEX line. This will guide you in selecting the appropriate-sized tanks and PEX pipes for your tiny house plumbing line.

A couple living full-time in a tiny home might use around 20 gallons per person per day in their water line. In contrast, a single weekend dweller may only need half of that.

Tiny houses often face strict zoning laws. Before installing your plumbing system, check with local authorities about any specific requirements or restrictions.

Some areas might not allow certain types of tiny house systems or require inspections for finish plumbing installations. Ensuring compliance can save you from hefty fines or having to redo work.

Select Materials

Choosing durable materials and the correct tools is essential for a successful installation. For pipes, PEX tubing is popular due to its flexibility and ease of installation. You’ll also need various fittings, valves, and fixtures tailored to a grid plumbing system or an off-grid setup.

The tool list should include pipe cutters, wrenches, and possibly crimping tools if using PEX connections.

Visualizing Tiny House Plumbing Layouts

After planning your DIY tiny house plumbing system, visualizing the layout becomes the next crucial step. It’s about smartly using space and ensuring maintenance is straightforward.

Compact Design Maximization

Tiny houses challenge us to think differently about space. Every square inch counts. In plumbing, this means using compact designs that don’t waste precious room. Pipes might run inside walls or under floors to stay out of sight and out of the way.

A plumbing diagram is essential here. It shows where each pipe and fixture will be located. This helps prevent clashes with other systems like electrical wiring. A well-thought-out diagram saves headaches later.

Blueprint Integration

Your tiny house blueprints are the master plan for your build. Integrating plumbing into these plans from the start ensures everything fits together seamlessly.

When drawing up blueprints, consider where you’ll need water access. Kitchens and bathrooms are obvious, but what about an outdoor shower or a washing machine? Grid plumbing layouts can guide you on standard practices, but remember, in a tiny house, customization is key.

Think about future changes too. Will you want to add features later? If so, design your system to allow for easy upgrades or expansions.

Accessible Maintenance Strategies

Maintenance is an aspect often overlooked until there’s a problem. But in a tiny home, it’s vital to have accessible maintenance points within your layout.

Imagine having to tear apart your kitchen just to fix a leaky pipe! Instead, create access panels or choose fixtures that can be easily removed if needed.

Here are some strategies:

  • Use flexible piping where possible to simplify repairs.
  • Place shut-off valves in convenient locations.
  • Consider using higher quality materials that may have longer lifespans and less frequent need for repairs.

These steps might cost more upfront but can save time and money down the line.

Installing Freshwater Systems for Off-Grid Living

After planning your tiny house plumbing layout, the next step is to establish a reliable freshwater system. Ensuring access to clean drinking water and an efficient pumping system is critical for off-grid living.

Freshwater Source Options

Your tiny house needs a steady water supply. Here are some common sources:

  • Rainwater Collection: This method captures rain from your roof. It’s eco-friendly and cost-effective but depends on local rainfall patterns.
  • Wells: Drilling a well can provide a private water source. The initial cost is high, but it’s a long-term investment.
  • Municipal Hookups: If available, this option offers convenience. You’ll have continuous access to fresh water without the need for purification.

Filtration Essentials

Clean drinking water is vital. Here’s how to ensure its purity:

  • A good Water Filter removes contaminants like dirt, bacteria, and chemicals.
  • Purification systems such as UV lights or reverse osmosis add another layer of safety.

Regular testing keeps you informed about your water quality.

Energy-Efficient Pumps

The right pump makes life easier. Consider these points:

  • Choose pumps designed for low power consumption; they’re perfect for tiny homes with limited energy resources.
  • Look for models that balance efficiency with sufficient pressure for daily tasks.

A properly sized pump reduces wear and saves energy costs over time.

Implementing Key Bathroom Fixtures in Small Spaces

Creating a functional bathroom in a tiny house calls for compact fixtures and smart placement. Innovations like composting toilets and tankless water heaters are game-changers for small spaces.

Space-Saving Toilets

Tiny homes often mean every inch counts. Traditional toilets can take up too much room. But space-saving toilets are designed to fit snugly into smaller bathrooms without sacrificing comfort. Some models even have sinks attached on top, which means the same water used for handwashing fills the toilet tank, saving space and water.

Compact Sinks and Showers

Size matters. You’ll want something that doesn’t overwhelm the space but still gets the job done. Wall-mounted bathroom sinks free up floor space, making the room look bigger than it is. For showers, consider a corner shower stall with sliding doors to minimize its footprint.

  • Examples of compact fixtures:
  • Corner bathroom sinks
  • Narrow cabinets
  • Shower stalls with folding seats

Innovative Bathroom Products

Eco-friendly options like composting toilets eliminate the need for traditional plumbing and reduce water usage dramatically. They’re perfect for off-grid living as discussed earlier regarding freshwater systems. Tankless water heaters provide hot water on demand without taking up precious space with a bulky storage tank.

  • Benefits of innovative products:
  • Water conservation
  • Reduced spatial requirements
  • Enhanced sustainability

Ergonomic Fixture Placement

The layout of your tiny house bathroom is crucial for functionality. Placing fixtures ergonomically makes them more comfortable to use daily. The toilet should be accessible but not obstructive; the sink needs clearance for elbows during use; and ensure there’s enough room to step out of the shower safely.

  • Tips for ergonomic placement:
  • Install towel bars on interior walls.
  • Position shower drains where they won’t impede movement.

Adhering to Building Codes

It’s essential to know your local building codes before installing any plumbing in your tiny home. These regulations will influence where you can place things like your kitchen sink or toilet within the bathroom layout.

Managing Water and Waste: Storage, Pumps, and Drains

In a DIY tiny house plumbing kit, it’s crucial to consider how water enters, circulates, and leaves your space. The right tanks, pumps, and drainage are key to a functional system.

Sizing Your Tanks

Water storage is like the lifeblood of your tiny house. You need tanks for fresh water to use in sinks and showers, as well as grey and black water that comes from washing machines or toilets. It’s not just about picking any tank; you have to size them based on your daily water usage. If you’re living solo or with another person, a smaller tank might suffice. But more occupants mean larger tanks.

For instance, if you plan on using 30 gallons per day for all your needs, your fresh water tank should hold at least this amount. Greywater tanks can be slightly larger since they accumulate waste from sinks and showers. Black water tanks – holding waste from toilets – must also be sized appropriately but remember they require regular emptying.

Choosing the Right Pump

The pump in your plumbing system creates pressure so that when you turn on a tap, water flows out smoothly. There are different types of pumps suited for various systems. A simple hand pump could work if you’re going off-grid with minimal needs.

But if you want the comfort of traditional home plumbing with multiple fixtures running simultaneously – think shower while someone else is in the kitchen – then an electric pump with higher pressure capabilities is what you need. It’s essential to match the pump size with your system’s demands; otherwise, it either won’t deliver enough pressure or will be too powerful and wasteful.

Effective Drainage Solutions

Drainage is critical because no one wants backups or odors in their tiny house! Start by ensuring each fixture has its own drain pipe leading to either a central sewer system or an individual waste treatment solution like a septic tank.

PVC drain pipes are popular because they’re durable and easy to install. For kitchens and bathrooms sharing a wall, consider a single drain pipe setup where both feed into one main line – saving space without sacrificing function.

Remember too that venting is part of effective drainage; it prevents traps from siphoning dry which can lead to those unwanted smells.

Protecting Your Plumbing from Freezing and Leaks

Ensuring your DIY tiny house plumbing kit withstands the elements is crucial. Insulation, leak detection, and regular maintenance are key to longevity.

Insulation Techniques

Proper insulation keeps water lines from freezing. In cold climates, this is a must for any plumbing system. Wrap pipes with foam or fiberglass sleeves. These materials act as a coat in winter for your cold water line and hot water heater alike. Pay special attention to areas where cold air infiltrates, such as near doors or windows.

Insulate both hot and cold pipes to prevent condensation and energy loss. For exposed outdoor piping or those in unheated spaces like basements, consider heating cables. They provide warmth directly to the pipes when temperatures plummet.

Leak Detection Methods

Leaks can be disastrous in small spaces. Early detection saves you from extensive damage. Install moisture sensors near plumbing fixtures and water heaters. These devices alert you when they detect dampness.

Regularly inspect visible pipes for signs of wear or dripping. This includes drain lines under sinks and behind toilets. Use a flashlight to check harder-to-see spots like corners and connections.

For added security, perform dye tests on toilets to ensure there are no silent leaks wasting water unnoticed.

Seasonal Maintenance Tips

Routine checks keep your system running smoothly all year round. Before winter hits, disconnect outside hoses from spigots to prevent freezing inside the pipe which could lead to bursts.

Drain sprinkler systems completely before the first freeze arrives. Any remaining water could expand and crack the PVC pipes.

Flush your hot water heater annually to remove sediment buildup at the bottom of the tank which can reduce efficiency over time.

Inspect seals around fixtures regularly for signs of cracking or brittleness that could indicate potential leaks waiting to happen.

Detailed Costs and Materials for Your Plumbing Project

Planning your DIY tiny house plumbing project requires a clear budget for materials like pipes and fixtures, as well as potential labor costs. It’s crucial to weigh the cost-effectiveness of different materials such as PVC versus PEX and anticipate hidden expenses like tools or emergency repairs.

Budgeting Accurately

Creating a precise budget is the foundation of any successful DIY plumbing project. You need to account for every piece of pipe, each fixture, and the possibility of hiring help.

  • Pipes: Depending on the size of your tiny house, you might spend anywhere from $500 to $2,000.
  • Fixtures: Sinks, toilets, and faucets can range from $100 to over $500 each.
  • Labor: If you’re not going it alone, professional plumbers typically charge between $45 to $150 per hour.

Remember that quality matters. Cheaper isn’t always better if it means more repairs down the line.

Material Comparison

When selecting plumbing materials, you have two popular options: PVC or PEX piping. Each has its pros and cons in terms of cost and installation ease.

PVC (Polyvinyl Chloride):

  • Less expensive
  • Rigid structure may require more connectors
  • Can be harder to install in tight spaces

PEX (Cross-linked Polyethylene):

  • More flexible; easier to weave through walls
  • Typically more costly than PVC
  • Often has a longer lifespan with less maintenance required

Cost-wise, PVC might seem like the winner at first glance. But PEX could save money over time due to its durability.

Hidden Expenses

Every DIY project has surprise costs. For plumbing, these might include:

  • Tools: A pipe cutter or crimping tool can add an additional cost ranging from $25-$100.
  • Emergency Repairs: A burst supply line could lead to unexpected expenses quickly escalating into hundreds of dollars.

It’s smart to set aside an extra 10% – 15% of your total estimated budget for these just-in-case scenarios.

Advanced Plumbing Techniques for Tiny Homes

After understanding the costs and materials needed for tiny house plumbing, it’s crucial to explore advanced techniques. These can optimize water usage and ensure a sustainable lifestyle in your tiny home.

Greywater Systems

Greywater systems are a game-changer in reducing water consumption. They recycle water from sinks, showers, and washing machines for non-potable uses. In a tiny home, installing a greywater system means less fresh water is needed. This is because reused water can go towards toilet flushing or gardening.

For example, a tiny house shower can drain into a filtration system. The cleaned greywater then irrigates plants or flushes toilets. It’s an efficient cycle that saves gallons of water daily.

High-Tech Monitoring

Monitoring systems have gone high-tech. They help manage resource usage and detect issues without needing to be on-site physically. A smart monitoring system in your tiny home could alert you to leaks or overuse through an app on your phone.

Imagine getting real-time data about how much water you’re using each day. Or being notified instantly if there’s an unusual spike in consumption that could indicate a leak. These systems provide peace of mind and help maintain the delicate balance of resources in a tiny home environment.

On-Demand Water Heating

The latest innovations in heating water are designed with efficiency in mind. On-demand or tankless water heaters only heat up as much water as you need when you turn on the tap. This means no energy is wasted keeping gallons of water hot all day long.

In traditional homes, heating up large tanks of water can be costly and inefficient compared to these modern solutions suitable for tiny homes:

  • Electric tankless heaters: Compact and perfect for smaller spaces.
  • Gas-fired models: Offer higher flow rates if more hot water is required.

On-demand systems work great with low-flow fixtures commonly found in tiny homes, making them ideal companions for sustainable living.

Conclusion

You’ve journeyed through the nuts and bolts of tiny house plumbing, from the basics to advanced techniques. By now, you’re armed with the know-how to tackle your DIY project head-on. Whether it’s wrangling freshwater systems for off-grid living or ensuring your cozy bathroom has all the modern comforts, you’re ready to dive in. Remember, a well-planned and executed plumbing system can turn your tiny abode into a haven of efficiency and sustainability.

So, what’s stopping you? Roll up your sleeves and make those pipe dreams a reality! Share your tiny house plumbing adventures with us and inspire others to take the plunge. Your story could be the nudge someone needs to start their own DIY journey. Now, go on and create that snug sanctuary you’ve envisioned – one pipe at a time.

Frequently Asked Questions

What are the basics of tiny house plumbing?

Tiny house plumbing involves a simpler system compared to traditional homes, focusing on efficient use of space and resources. It typically includes freshwater input, wastewater management, and often off-grid solutions.

Understanding and addressing circuitry issues in air conditioners and furnace repair is no small task for a professional HVAC technician. Thermostats and costly repairs can further complicate the job. As the brain of your HVAC system, the AC circuit board controls everything from the air conditioning unit to the furnace, even managing the circuitry for the blower fan, ensuring you get that cool breeze on hot days. The condenser, a complex and delicate main component, orchestrates the symphony of various components within heat pumps and air conditioning systems – including the blower fan, refrigerant, fan motor, compressor, and furnace. When this conductor falters, so does your comfort.

Role and Function of AC Circuit Boards

Circuit boards are the unsung heroes of air conditioners. They manage everything, from temperature regulation to power distribution.

The Central Role in Controlling AC Functions

The circuit board is like the brain of your air conditioning unit, integral to your air conditioning system, fan motor, and wiring. Regular maintenance checks and 24/7 Help are constantly working behind the scenes, ensuring everything runs smoothly, even amidst frequent system shut downs, thanks to our dedicated technicians. When you adjust your thermostat, it’s the circuit board that gets the furnace heating, sets the blower in motion, and activates the condenser.

  • It interprets signals from the thermostat
  • Directs different components to kick into action
  • Ensures all parts work together for optimal cooling

Without a functioning capacitor and circuit board, your furnace and condenser in your AC unit are as good as a giant paperweight, susceptible to damage!

Facilitating Communication Between Components

Think of the circuit board as an air traffic controller, managing the capacitor, compressor, condenser, and heat within the system. Just like how controllers guide planes safely on their routes, circuit boards ensure all components of your AC, including the capacitor, compressor, condenser, and indoor unit, work in harmony.

  • They coordinate operations between different parts
  • Communicate commands from one component to another
  • Prevent clashes and breakdowns due to miscommunication

If there’s a glitch in this communication network, likely due to a faulty control board, you’ll probably notice performance issues with your AC, furnace, compressor, and condenser.

Regulating Temperature Based On User Settings

Ever wondered how your home stays cool even during sweltering summer days, thanks to the furnace, indoor unit, refrigerant and compressor? Well, thank your AC’s circuit board for that! The furnace and compressor, crucial parts of Heating & Cooling systems, along with the refrigerant and indoor unit, are responsible for maintaining a comfortable temperature based on user settings. These elements are integral to Heater Services and Heating Services, typically provided by HVAC Services.

Here’s how:

  1. You set a desired temperature on your thermostat.
  2. The thermostat sends this information to the circuit board.
  3. The circuit board directs various components such as the capacitor, refrigerant, indoor unit, and compressor to achieve and maintain this temperature, facilitating effective moisture control.

It’s like having a personal Indoor Air Quality (IAQ) Solutions compressor unit acting as your weather controller right at home!

Managing Power Distribution To Various Parts

The last but definitely not least role of an AC’s circuit board is handling power distribution to the compressor and unit. Just like a meticulous accountant balancing books, the compressor unit ensures every part gets just the right amount of power it needs without wasting energy.

For instance:

  • If you increase the cooling level, more power is directed to the compressor unit.
  • On milder days, when less cooling is needed, the compressor unit conserves energy by reducing power supply to certain parts.

This smart power management not only keeps your AC compressor unit and clean air ducts running efficiently but also helps cut down on your energy bills.

Identifying Common AC Circuit Board Issues

Signs of Recognition

Ever had those days when your AC’s compressor unit is acting all funky and you need an air conditioner fix? Like your compressor is not cooling properly, or worse, not starting at all? Maybe it keeps shutting down randomly. These erratic behaviours are classic signs that there might be issues with the compressor circuit board.

If you’re noticing irregular cooling in your compressor, don’t just brush it off as a minor glitch. It could indicate a bigger problem lurking beneath the surface. The same goes for an AC system or furnace showing replacement signs, such as refusing to start or frequently shutting down without warning.

Physical Damage on the Board

But hey, sometimes the problem is right in front of us, clear as day! Have you ever seen burn marks or corrosion on your AC’s circuit board? If yes, then bingo! You’ve found your culprit.

Burns and corrosion can severely affect how well your circuit board functions. They can cause shorts and open circuits which lead to inconsistent performance from your air conditioner.

Unusual Noises from the Unit

You know how we humans make weird noises when we’re unwell? Well, guess what – so does your air conditioner! If you hear unusual sounds coming from it, this could mean trouble for its relay switches.

Relay switches play a crucial role in controlling power flow within an AC unit. When they go haywire due to faulty circuit boards, strange noises often follow suit. So keep those ears peeled!

Inconsistent Performance

Last but definitely not least, let’s talk about inconsistent performance. This heating repair issue can be a bit tricky because many factors can cause it – but a faulty thermostat connection is often at fault here.

Regular AC Repair and maintenance checks on your air conditioner’s circuit board, along with Furnace Repair, Furnace Fix, and Duct Cleaning, can save you a lot of dough in the long run. This could be a sign that you need heating repair or even furnace replacement. One moment it might be freezing cold; next thing you know it’s hotter than July!

Troubleshooting and Repairing AC Circuit Boards

Safety First Disconnect Power

Before you start poking around your air conditioner’s circuit board, remember to disconnect the power. It’s not just about avoiding a shock; it’s also about protecting your system from further damage.

Look for Visible Damage

The first step in understanding AC repair, specifically addressing circuit board issues in air conditioners, is to check for visible damages or loose connections. Sometimes, problems are as simple as a wire that has come loose or a visibly burnt component.

  • A faulty control board may have dark spots or areas where the circuits look fried.
  • Loose wires can cause intermittent issues, making your AC act like it’s got a mind of its own.

Get Handy with Your Multimeter

If there are no obvious signs of damage, whip out your multimeter. Use this handy Installation Guide tool to test voltage supply and continuity issues.

  • A running capacitor that isn’t getting enough voltage could be causing your AC woes.
  • Continuity checks can help identify if any part of the circuitry is broken or disconnected.

Remember, though! Unless you’re a professional in heater services, don’t poke around too much with your furnace in the bedroom closet. Follow heating tips from experts. You wouldn’t want to turn a minor issue into costly repairs!

When Replacement Beats Repair

Sometimes, despite our best efforts at troubleshooting and repair, replacement becomes the only option. If the printed circuit board is beyond repair or if fixing it would cost more than replacing it – it’s time to say goodbye.

  • An overheating system could have damaged multiple components on the circuit board.
  • In some cases, even technicians might recommend replacement over a furnace fix for an old unit with recurring issues.

Understanding Indoor and Outdoor AC Unit Components

Indoor Vs Outdoor Units

Your air conditioner, an important part of AC installation, has two main components: the indoor unit and the outdoor unit. This is integral to understanding the future of AC. The indoor part, also known as the evaporator coil, works hand in hand with the blower.

On the flip side, we have the outdoor unit. This is home to the compressor and condenser.

  • Air Cleaners‘ Compressor: Imagine this as a big heart pumping refrigerant through your AC system, contributing to Air Purification.
  • Condenser: This component acts like a hot potato. It takes all that heat from inside your house and tosses it outside.

Circuit Board: The Maestro of Your AC System

Now that we’ve met everyone in the band, let’s talk about their conductor – the circuit board. It’s this little genius that tells every part when to play its tune for perfect harmony.

The circuit board is like an orchestra conductor directing each instrument – or in our case, each component – telling them what to do and when to do it. If one instrument plays off-key or misses its cue, well… you get a pretty messed up concert!

Importance of Both Units Functioning Properly

For our cool symphony to play without any hiccups, both units need to work together seamlessly. Just like peanut butter needs jelly for that perfect sandwich, these parts need each other for top-notch cooling action.

If either unit decides to go on vacation (malfunctions), our beautiful melody turns into a screeching nightmare! You’re left with an inefficient system not doing its job properly – leaving you hot under the collar!

When Circuit Boards Go Bad

Just as a conductor with a broken baton can’t lead an orchestra, a faulty circuit board can cause chaos in your AC system. This could be due to a variety of reasons like power surges, voltage issues or just plain old wear and tear.

When this happens, either the indoor or outdoor unit might not function properly. This means you’re left sweating it out while your AC plays out of tune!

Importance of Regular Maintenance Checks

Early Detection of Potential Issues

Regular AC Repair and maintenance checks on your air conditioner’s circuit board, along with Furnace Repair, Furnace Fix, and Duct Cleaning, can save you a lot of dough in the long run. How, you ask? Regular AC Repair and maintenance checks on your air conditioner’s circuit board, along with Furnace Repair, Furnace Fix, and Duct Cleaning, can save you a lot of dough in the long run. They have their pros and cons.

  • Noticed your AC system shutting down frequently? That’s a malfunction waiting to happen.
  • Hearing strange noises when your AC is running? Could be an issue with the motor.
  • Is there a weird smell coming from your unit? It might be leaking gas.

These are all signals that something might be off with your circuit board.

Ensuring Optimal Performance and Longevity

Now, we all want our stuff to last long and work well, right? The same applies to your AC system. Regular maintenance ensures it runs efficiently and lasts longer than a cat with nine lives.

Here’s the deal:

  • Proper installation: A well-installed circuit board reduces chances of damage.
  • Regular cleaning and moisture control: Keeping the area around the circuit board clean prevents dust accumulation and moisture, which can cause short circuits.
  • Installation Guide checks: Going through the Installation Guide helps understand how to keep the system running smoothly.

Cleaning Circuit Board Area

Dust is like that uninvited guest who crashes at your place and causes chaos. Similarly, dust accumulation around the circuit board can lead to short circuits. So regular cleaning is as important as those yearly doctor check-ups you should never skip!

Professional Inspections for Thorough Assessment

Sure, DIY is fun and all but some things are better left to professionals. Periodic professional inspections ensure nothing gets missed during regular checks. They have the know-how and tools to provide a thorough assessment of any potential issues that might reduce efficiency or value.

So don’t skimp on getting expert help! Regular AC Repair and maintenance checks on your air conditioner’s circuit board, along with Furnace Repair, Furnace Fix, and Duct Cleaning, can save you a lot of dough in the long run. This is a piece of HVAC advice to keep in mind, especially during AC installation. It’s the future of AC to prioritize safety and efficiency.

When to Seek Professional Assistance

Troubleshooting Isn’t the Answer

Let’s get real. Sometimes, DIY troubleshooting doesn’t cut it. You’ve tried all the steps, but your air conditioner’s circuit board is still acting up. It’s like trying to solve a puzzle with missing pieces. In such cases, it’s time to call in the pros.

They have the technical knowledge and experience to diagnose potential issues accurately. They can spot things you might miss and provide Quick Response solutions that are safe and efficient.

Electrical Shock Risks

Air conditioners aren’t just boxes of cold air; they’re complex IAQ Solutions with potentially dangerous parts. Dehumidifiers, like air conditioners, also play a key role in maintaining indoor air quality. If there’s a risk of electrical shock or further damage to the unit, don’t play hero.

It’s not worth risking your safety or damaging your AC even more by trying to fix an issue beyond your understanding. Like poking a sleeping bear, messing with electricity can lead to some shocking results!

Replacing Circuit Boards

Replacing a faulty circuit board isn’t as easy as swapping batteries in a remote control. It requires technical know-how and precision – something professionals have in spades.

Think about it this way: would you rather trust yourself doing brain surgery based on info from WebMD or let an actual surgeon do their thing? The same logic applies here.

Persistent Cooling Efficiency Issues

Remember those regular maintenance checks we talked about earlier? Well, if they reveal persistent problems with HVAC cooling efficiency, you need professional HVAC help.

Imagine running on a treadmill that keeps changing speeds randomly – frustrating right? That’s how your AC feels when it can’t cool your room properly due to circuit board issues, signaling an Air Conditioner Fix is needed.

Ensuring Healthy AC Circuit Boards

Alright, let’s wrap this up. You’ve now got the lowdown on the crucial role of AC circuit boards and how to spot common issues. Not only that, but you’re also savvy about indoor and outdoor HVAC unit components, the importance of regular HVAC services for maintenance checks, and when it’s time to call in the HVAC pros. It’s like having a cheat sheet for your AC!

But remember, knowledge is power only when used right. Don’t just sit on this HVAC advice – use these heating tips and IAQ improvement info to keep your AC running smoothly and efficiently. And if you ever find yourself out of depth, don’t hesitate to reach out to our 24/7 Help, a team of professionals. They’ll sort out your AC woes in no time!

FAQs

What are some common signs of a faulty AC circuit board?

If your air conditioner isn’t turning on or keeps shutting off randomly, or if you notice erratic behavior from other components like fans or compressors, these could be signs of a faulty circuit board.

How often should I get my AC unit checked?

Regular maintenance checks should ideally be performed once every year. Quick Response from Emergency Services can help prevent minor issues from escalating into major problems. However, like all things, there are Pros and Cons to consider.

Can I fix my own AC circuit board issues?

While some basic troubleshooting can be done by yourself, it’s always safer and more effective to seek professional assistance for complex repairs involving electrical components.

What makes up an indoor and outdoor AC unit?

Both Heating & Cooling units contain critical parts such as fans, coils, Air Cleaners, and more that work together to provide efficient Cooling Solutions. These also include Clean Air Ducts to ensure your home is cooled efficiently.

When should I call a professional for assistance with my air conditioner?

If there’s an issue that you’re unable to resolve despite troubleshooting efforts or if there’s significant damage noticed during routine maintenance checks – it’s time to call in the professionals.

Winter months can be a real energy hog, causing your utility bills to skyrocket due to the use of space heaters, holiday lights, furnaces, and water heaters. It’s no surprise that as the cold weather kicks in, our use of heating services, particularly for space heaters and furnaces, often increases. This results in our energy consumption, specifically our electric bills and electricity bills, going through the roof. But what if there was a way to stay warm and cozy with space heaters, furnaces, or a fireplace without breaking the bank and even making savings? Can we really beat the chill with our space heater and furnaces, keep our electricity and water heater energy bills down at the same time? You bet! This post will guide you through some practical tips for enhancing energy efficiency and lowering your billing during winter, focusing on aspects like electricity usage and furnaces. We’ll explore how to prevent energy waste from your heating & cooling systems, make smart investments in your home like weather stripping and dampers to reduce your gas and electricity bill, and adopt more efficient habits to cut down your overall heating & cooling expenses.

Insulation Techniques for Heat Retention

Winter is coming, and you’re probably thinking about those skyrocketing bills, particularly for gas furnaces and electricity billing. But hey, don’t sweat it! I’ve got some HVAC advice and cool tips to help you keep the chill at bay without burning a hole in your pocket or inflating your energy bill. Explore cooling innovations and solutions, utilizing the latest cooling tech, for economical climate control. These include gas-related and space-saving ideas that won’t complicate your billing process.

Proper Insulation Maintains Indoor Temperature

Proper insulation is like that cozy winter blanket that keeps you warm on frosty nights, efficiently managing your indoor air quality and reducing your energy bill by controlling gas and electricity use in your space. It’s all about trapping the gas and electricity heat inside your home, stopping it from escaping and impacting your billing.

For instance, if your home isn’t insulated well, heat from gas or electric sources will sneak out like a thief in the night, increasing your bill. And what happens then? You crank up the gas or electric heater, leading to more energy consumption and higher utility bills.

But with good insulation during your AC installation, you can tell that sneaky heat to stay put, lowering your gas and electric bill. It’s like putting a lid on a pot of boiling water – it keeps the steam (read: heat) from escaping, similar to conserving gas or electric to lower your bill.

Different Types of Insulation Materials

Now let’s talk materials. There are plenty of options out there – fiberglass, mineral wool, cellulose, polyurethane foam…you name it! All these can impact your gas and electric bill.

Each material has its pros and cons:

  • Fiberglass: Cheap and easy to install but not as effective as other materials in reducing gas and electric bill.
  • Mineral Wool: More expensive than fiberglass but offers better fire resistance and can lower your gas bill.
  • Cellulose: Environmentally friendly option made from recycled paper.
  • Polyurethane Foam: Excellent insulator but can be pricey.

Choosing your gas provider is like picking out an outfit for a party – you gotta select what suits your style (and bill budget) best!

Importance of Insulating Windows and Doors

Next up are windows, doors, and furnace replacement signs – notorious spots for letting heat and gas escape.

Think about it this way – even if you’re wearing a warm jacket (that’s your wall insulation), cold air can still creep in through gaps in your clothes (windows and doors). That’s why adding an extra layer of protection here is crucial.

There are several ways to do this:

  1. Weatherstripping: It’s like adding a seal around your windows and doors.
  2. Window Film: Acts as an additional layer of insulation.
  3. Thermal Curtains: They work like a charm in keeping the cold at bay.

Remember, every little bit helps.

Optimal Thermostat Settings for Savings

Winter months can be brutal on your electric bill. But, don’t sweat it! We’ve got some smart thermostat hacks that will help you save big.

Lowering Thermostat When Away or Sleeping

Ever heard of the saying, “Out of sight, out of mind?” Apply this to your thermostat settings. When you’re not at home or catching those Z’s, lower your thermostat. This simple trick can lead to term savings on your electric bills.

For example, dropping the heat by 10-15 degrees for eight hours per day can save around 5-15% a year on your heating bill. That’s some serious coin!

The Magic of Programmable Thermostats

If remembering to adjust your thermostat sounds like a chore, then meet your new best friend – programmable thermostats. These nifty gadgets, known as dehumidifiers and cooling tech, let you set temperature schedules for different times and days, even if your furnace is in the bedroom closet.

Imagine waking up to a warm house without having to pay extra for it? Or coming home from work to just the right temperature? It’s all possible with a programmable thermostat.

According to Energy Star, an average household can save about $180 per year using one of these bad boys properly.

Ideal Settings for Comfort and Efficiency

Now let’s talk turkey – what are the ideal settings? Well, during winter months when you’re awake and at home, aim for around 68°F (20°C). While sleeping or away from home, try lowering it by 7-10 degrees.

Remember folks; every degree counts! According to the U.S Department of Energy, you can save up to 1% on energy bills for each degree if the setback period is over eight hours long.

Fireplace and Furnace Maintenance Tips

Winter is coming, folks! And with the furnace in the bedroom closet, those pesky utility bills seem to skyrocket as the temperature drops. But don’t fret; we’ve got some hot tips on cooling solutions to help you keep your cool (and your cash) during the chilly season.

Regular Cleaning Improves Fireplace Efficiency

First things first, let’s talk about your fireplace. You know, that cozy corner where you curl up with a good book while sipping on steaming hot cocoa? Yeah, that one. Keeping it clean is key to its efficiency.

With just a few heating tips and adjustments to how we use our heaters, hot water systems, and other heating services, we can all enjoy a warm winter without breaking the bank. Regular heating repair and maintenance of our heating & cooling systems can also contribute to this comfort. This makes duct cleaning essential. So make sure you give it a regular tune-up. A quick sweep every now and then could save you a pretty penny on fuel costs.

And remember: Always check for any blockages before lighting a fire, as part of your emergency services protocol!

Importance of Furnace Inspections

Next up: Your furnace. This bad boy does some heavy lifting during winter months, but like all hard workers, it needs occasional breaks too.

Regular inspections of your HVAC services are crucial for ensuring optimal performance from your furnace and heating repair. This includes tasks like clean air ducts and duct cleaning. An annual check by a certified professional can help identify potential issues early on – before they morph into costly repairs or replacements.

Don’t forget about those vents either! Blocked vents can affect air circulation and force your furnace to run longer than necessary – another big no-no for energy efficiency.

Using Humidifier with Furnace Conserves Heat

Finally, here’s a concept that might seem strange initially but bear with me: Use dehumidifiers and air cleaners for air purification alongside your furnace, ensuring clean air ducts. Why? Because moist air, under proper moisture control, holds heat better than dry air does.

Adding moisture into the mix means less work for the furnace since it won’t have to churn out as much heat to warm up your home. Plus, this little trick can also prevent dry skin and chapped lips – a common winter woe.

The Role of Smart Appliances

Smart appliances like Cooling Innovations and Air Cleaners are the new kids on the block that can help you save a pretty penny on your AC Repair bills. They’re shaping the Future of AC, especially during winter. They do this by reducing power consumption and offering Quick Response remote control options.

Power Consumption Reduction with Smart Appliances

Smart appliances, including AC units requiring repair and devices like refrigerators, are designed to be energy efficient. That’s tech-speak for saying they don’t hog up all your electricity. Think about it like this: if your fridge was a car, smart appliances would be the hybrid version—using less gas but still getting you from point A to B just fine.

  • For instance, modern smart fridges, much like the future of AC, have features like ‘Eco Mode’ that minimizes power usage.
  • Some even have vacation modes that consume less energy when you’re not around.

Remote Control with Smart Plugs

Next up, we’ve got smart plugs. These little gizmos let you control your appliances remotely using an app on your phone. It’s kinda like having a Quick Response magic wand—with our 24/7 Help, you can turn things off or on without even being in the same room!

  • Imagine forgetting to switch off your heater before leaving the apartment; with a smart plug, you can do it from wherever you are.
  • Another cool thing is scheduling; set timers for devices to switch off when not needed—like late at night or during work hours.

Energy Savings from Smart Thermostats

Lastly, let’s talk about smart thermostats. These babies learn your routine and adjust heating accordingly. So instead of blasting heat 24/7 (and burning cash while at it), these thermostats only warm up the place when people are actually there.

  • According to studies by utility providers, installing a smart thermostat can lead to savings of up to 15% on heating bills.
  • You also get cool features like geofencing that adjusts temperature based on how far or close you are from home.

LED Lights as an Efficient Alternative

LEDs Consume Less Electricity

Ever noticed how your utility bills skyrocket during the winter months? It’s no secret that with shorter days and longer nights, we tend to use more lights. But here’s a bright idea: switch to LED light bulbs. These little guys are energy-efficient powerhouses! They use up to 75% less electricity than traditional bulbs. That means you can keep your home lit without burning a hole in your pocket.

Water Heating Adjustments for Lower Costs

Winter’s chill often brings higher utility bills, but with Heater Services or a Furnace Fix to your heating system, you can keep those costs down. Don’t forget Cooling Services and Furnace Repair can also help in maintaining an efficient system. Let’s dive into the nitty-gritty of how you can save on energy costs this winter with these heating tips.

Turn Down the Heat

Lowering your water heater temperature is a simple yet effective way to reduce energy use. Most heaters are set at 140 degrees Fahrenheit by default, but lowering it to 120 degrees can cut your heating costs by up to 10%. It’s like turning off one out of every ten light bulbs in your house—small change, big impact!

Insulate Hot Water Pipes

Just as you bundle up in winter to prevent heat loss, insulating your hot water pipes does the same thing. By wrapping them in foam pipe insulation, you slow down heat loss and reduce the time you wait for hot water. This means less wasted water and more savings on your utility bill.

Regular Heater Maintenance

Just like scheduling regular health check-ups at the doctor’s office, performing timely maintenance checks on your home’s water heater ensures its optimal efficiency. A well-maintained heater works better and lasts longer. So get that heating system checked with furnace repair and heater services before Jack Frost starts nipping at your nose—and wallet! Don’t forget to seek HVAC advice for a quick furnace fix!

Consider Space Heaters

If you’re only using a couple of rooms during winter months, consider using space heaters instead of cranking up the central heating system. They consume less energy and can help lower electricity bills significantly.

Remember these tips when winter comes knocking and watch those utility bills drop! With just a few heating tips and adjustments to how we use our heaters, hot water systems, and other heating services, we can all enjoy a warm winter without breaking the bank. Regular heating repair and maintenance of our heating & cooling systems can also contribute to this comfort.

Recap on Winter Energy Conservation

So, we’ve covered the nitty-gritty of keeping your utility bills in check during those chilly winter months. From AC Installation techniques to thermostat settings, and from IAQ Improvement smart appliances to LED lights – you’re now armed with an Installation Guide and a wealth of IAQ Solutions knowledge! But remember folks, it’s not just about knowing these Installation Guide tips; it’s all about putting them into action. So go ahead, give these strategies a shot and watch your winter bills take a nosedive!

As they say, “the proof of the pudding is in the eating.” Well, the proof of energy conservation is in your lower bills! We’re confident that these tips will help keep you cozy without breaking the bank. With just a few heating tips and adjustments to how we use our heaters, hot water systems, and other heating services, we can all enjoy a warm winter without breaking the bank. Regular heating repair and maintenance of our heating & cooling systems can also contribute to this comfort. Our 24/7 Help is here for you. Reach out to us anytime.

Frequently Asked Questions

What are some quick ways to save on heating costs?

Turning down your thermostat by just one degree can save up to 10% on your heating bill. Also, consider using draft stoppers on doors and windows to prevent heat loss.

Can LED lights really help lower my utility bill?

Absolutely! LED lights use up to 80% less energy than traditional bulbs and last much longer too.

How does proper maintenance of furnace help in saving energy?

A well-maintained furnace operates more efficiently which means it uses less fuel and produces more heat. Regular checks of emergency services can also prevent costly repairs down the line.

What role do smart appliances play in reducing utility bills?

Smart appliances are designed for efficiency. They often include features like energy-saving modes or automatic shut-off timers that can significantly reduce power consumption.

Are there any benefits of lowering water heater temperature?

Lowering your water heater temperature can indeed save energy as well as prevent scalding accidents at home. Most manufacturers set temperatures at 140°F which is higher than necessary for most households.

As the holiday season approaches, it’s crucial to heed HVAC advice and perform regular maintenance on your water heater, air vents, and cooling services to ensure your heating systems are in top shape. Early check-ups of your heating systems, including HVAC services and furnace repair, along with cleaning of air vents can prevent unexpected failures. This HVAC advice ensures your house stays warm and inviting for holidays, avoiding the need for a last-minute furnace fix. More than just comfort, well-maintained heater services or air conditioning systems can offer significant energy savings. A properly managed zone heating or hot water system is indeed a gift that keeps on giving! But neglecting this crucial aspect of your home, such as vents and hvac system maintenance, could lead to risks including gas leaks, water and plumbing issues, and the need for cleaning. This post will guide you through 10 essential holiday heating tips, covering everything from vent covers, zone heating strategies to efficient HVAC system use. It will also help you manage water usage and prepare your home for guests. So whether you’re hosting the big holiday party for guests or simply enjoying the bubble wrap season at home, let’s make sure it’s cozy with heating systems and safe with the help you need.

Essential Furnace Maintenance and Safety

Duct Cleaning and Air Conditioner Fix, like furnace maintenance, are must-dos for efficient heating during the party season. This system can help ensure cozy holidays. Let’s dive into the nitty-gritty of it.

Regular Cleaning Boosts Efficiency

Your furnace, like any other machine, needs regular cleaning. Dust, dirt, and grime can clog up your system, making it work harder than necessary, which won’t help when preparing for your holiday party. This not only reduces the efficiency of your heating system but also shortens its lifespan, potentially impacting your party.

  • Clean your furnace every month during heavy use periods.
  • Pay special attention to the air filter. A dirty air filter restricts airflow during a party, causing the system to overwork.

Imagine driving your car with a flat tire; that’s how your furnace feels when you neglect its party system and don’t clean it regularly!

Professional Inspection Is Key

While regular cleaning is crucial, some aspects such as a party or system require professional eyes. A pro within the party system can spot issues you might miss and fix them before they turn into costly repairs.

  • Schedule an annual inspection with a certified HVAC technician.
  • Pros in the heating services system have specialized tools and expert knowledge to thoroughly inspect your furnace.

Think of it like weighing the pros and cons of going to a system doctor for an annual check-up; you might feel fine, but there could be underlying system issues only a doctor can detect.

Ventilation Is Crucial For Safety

A well-ventilated furnace operates safely. Without proper ventilation and air purification, harmful gases like carbon monoxide could build up in your home, affecting the indoor air quality. Clean air ducts are essential to prevent this.

  • Ensure vents are clear of obstructions.
  • To enhance home safety, install carbon monoxide detectors near the furnace as an added precautionary measure.

Remember, safety first! Just as you wouldn’t drive without seatbelts, don’t operate a furnace without ensuring clean air ducts. For proper ventilation, consider our emergency services.

Time To Replace Old Furnaces

Older furnaces tend to be less efficient and more prone to breakdowns. If your furnace is more than 15 years old or constantly needing repairs, these are clear furnace replacement signs. Consider replacing it with a new energy-efficient model.

  • Newer models in the future of AC are more energy-efficient, saving you money in the long run.
  • They also come with advanced safety features for quick response and peace of mind.

Think about it like upgrading your old flip phone to a smartphone; you’ll get more features, better performance, and improved efficiency with Quick Response!

Effective Window Sealing Techniques

Winter’s here, folks! And with it comes the age-old struggle to keep our homes warm without breaking the bank, pondering the future of AC. Unfortunately, the task doesn’t provide any keywords to be used for the revision. Please provide the necessary keywords.

Weatherstripping for Gaps Around Windows

Ever noticed a chilly draft even when your window is closed? That’s probably because of gaps around your windows.

Try weatherstripping. It’s like putting a winter coat on your windows – snug and warm!

  • Pros: Cheap, easy to apply, and readily available.
  • Cons: Might need replacement after a few seasons.

Window Film Insulation Kits Benefits

If weatherstripping is a winter coat, then window film insulation kits are like thermal underwear for your windows.

This Installation Guide provides kits that come with plastic shrink film. You apply it directly onto your window glass using double-sided tape and a hairdryer.

  • Pros: Affordable and effective in reducing heat loss.
  • Cons: Installation might be tricky for first-timers.

Caulking as Solution for Window Frame Cracks

Got cracks in your window frames? Caulk ’em up!

Caulking helps seal those pesky crevices where cold air loves to sneak in. Just remember to clean the area first before applying the caulk.

  • Pros: Inexpensive and simple solution.
  • Cons: Requires regular inspection as caulk can degrade over time.

Thermal Curtains as Additional Insulating Layer

Think of thermal curtains as cozy blankets for your windows. They add an extra layer of insulation, keeping warmth in and cold out.

Not only do Air Cleaners help save energy, but they also spruce up any room with their various designs and colors!

  • Pros: Stylish way to conserve energy.
  • Cons: More expensive than other options mentioned above.

So there you have it! Four tried-and-tested techniques to keep Jack Frost from sneaking in through your windows. Remember, every little bit helps.

Optimal Thermostat and Ceiling Fan Use

Smart Thermostat Settings

We all love a warm house, right? But do we need it toasty when we’re out or catching some Z’s? Nah.

Lowering your thermostat settings when you’re away or asleep can save energy big time. Imagine the savings stacking up like pancakes at an all-you-can-eat buffet!

Programmable thermostats are another cool tool in our arsenal. They’re like personal assistants for your heating system! You set ’em up once, and they adjust the heat automatically, based on your schedule.

Ceiling Fans Aren’t Just for Summer

You might think ceiling fans, a common Cooling Solution, are just for circulating cool air in summer, but these Cooling Innovations have a trick up their sleeve for winter too, showcasing the versatility of Cooling Tech.

Flipping the direction switch on your ceiling fan makes it spin clockwise. This pushes warm air down from the ceiling where it tends to gather. It’s like having an invisible giant stirring the air so that heat is evenly distributed throughout the room.

The Impact of Proper Management

Now let’s discuss the pros and cons of energy savings from proper thermostat management – because who doesn’t love saving money?

According to Energy Star, you could save about $180 per year by properly setting your programmable thermostat and maintaining those settings. That’s enough dough saved to buy everyone in your family a holiday sweater!

By properly utilizing our ceiling fans and cooling solutions like air conditioning, we can reduce the strain on our heating systems and enhance our cooling tech efficiency. This means even more savings – cha-ching!

Insulation: Attics, Doors, and Draft Prevention

Adequate Attic Insulation Thickness

AC installation and attic insulation are top dogs in keeping your home warm during the holiday season. It’s like wearing a woolen hat in winter – it stops heat from escaping through the top of your house. But how thick should it be? Well, experts suggest that for optimal performance, attic insulation should be about 12-15 inches thick. That’s roughly the size of a medium pizza!

If you’re not sure about your current insulation thickness or need an upgrade, consider hiring a pro. They can measure and perform AC installation, ensuring proper insulation to prevent any air leaks.

Door Sweeps Installation

Doors are like gatekeepers to your castle – they can let in cold drafts if not sealed properly. Installing door sweeps is one way to prevent this chilly intrusion. Think of them as tiny doormats glued to the bottom of your doors.

Door sweeps act like barriers between the interior and exterior areas of your home, preventing cold air from sneaking in under the door. Plus, they’re easy to install and cost-effective too!

Using Foam Tape for Sealing Gaps

Now let’s talk about those pesky gaps around doorframes. These little spaces might seem harmless but boy oh boy, they can let in quite a draft! The good news is we’ve got foam tape for that.

Foam tape works like magic by sealing these gaps effectively while being easy on the pocket. Just stick it onto clean surfaces around doorframes and voila – no more drafts!

Role of Draft Stoppers

Finally, we have draft stoppers – our secret weapon against cold air intrusion! Imagine having a Cooling Innovations‘ invisible shield blocking all unwanted cold air from entering your cozy space.

Draft stoppers are placed at windows or doors where drafts are likely to occur. They come in different styles and sizes so you can find one that fits your needs. Not only do they prevent cold air from entering, but they also keep warm air from escaping.

Humidifiers: Whole-Home vs. Single Room

Whole-Home Humidifiers for Consistent Comfort

Whole-home humidifiers are the real deal. They maintain a consistent humidity level throughout your house, ensuring moisture control and making every room comfortable during the holiday season.

Imagine this scenario: you’re chilling in your living room, sipping on some hot cocoa. The air feels just right, not too dry or too damp.

That’s what whole-home humidifiers do. Dehumidifiers, as part of Heating & Cooling systems, regulate airflow and water vapor across all rooms, ensuring an even distribution of moisture and providing effective IAQ Solutions.

Single Room Humidifiers for Targeted Moisture

But what if you only need extra moisture in one area? That’s where single room humidifiers come into play.

These Air Cleaners are perfect bad boys for smaller spaces or specific rooms needing extra love in winter months. You can move them around easily to target areas with drier air flow.

For instance, you might want more moisture in your bedroom at night to prevent waking up with a dry throat. Just pop a single room air purification humidifier in there and voila! Problem solved.

Perceived Warmth and Indoor Comfortability

Here’s something cool: humidity levels can actually impact how warm or cold we feel indoors.

When it’s super dry inside, our bodies lose heat faster because water evaporates more quickly from our skin. This makes us feel colder than we should be.

But with the right amount of indoor humidity (thanks to our trusty humidifiers), we can feel warmer without cranking up the heater!

Health Advantages of Optimal Indoor Humidity

Remember that dry throat I mentioned earlier? Well, optimal indoor humidity achieved through the use of dehumidifiers can help prevent health issues linked to dry air and other moisture control problems, contributing to IAQ (Indoor Air Quality) improvement and offering effective IAQ solutions.

Dry air can cause stuff like chapped lips, bloody noses, itchy skin, and respiratory problems. Yikes!

By maintaining proper humidity levels for Indoor Air Quality during colder periods (around 30%-50%), we can avoid issues and breathe easier, contributing to IAQ Improvement. Now, that’s a holiday gift worth giving!

Safe Fireplace Usage During Holidays

The holiday season is here, and you know what that means: time to cozy up by the fireplace. But before we get all warm and fuzzy, let’s chat about how to use your fireplace and furnace in the bedroom closet safely.

Chimney Cleaning Prevents Fire Hazards

First things first, clean that chimney! It’s super important. You don’t want a nasty buildup of creosote (a black or brown residue that sticks to the inside of your chimney). It’s flammable and can cause a fire if not removed.

So, how often should you clean it? Experts recommend at least once a year. If you haven’t done it yet this year, now’s the perfect time.

Using A Screen Keeps Sparks In Check

Next up: get yourself a good screen for your fireplace, especially if you have a furnace in your bedroom closet. This isn’t just for looks—it helps keep those pesky sparks from flying out and causing trouble.

There are tons of options on the market, so pick one that fits your style and budget. Just remember: safety over aesthetics!

Keep Flammables At Bay

This might seem like common sense, but it’s worth repeating: keep anything flammable away from your fireplace during holidays.

That means no Christmas stockings hanging off the mantle while there’s a fire going—sorry Santa! And definitely no real pine garlands or wreaths nearby either—they’re major fire hazards.

Proper Ventilation Is Key

Last but certainly not least: make sure your room is well-ventilated when using the fireplace.

Why? Well, burning wood produces carbon monoxide—a poisonous gas that can build up in poorly ventilated spaces. So crack open a window or door every now and then to let fresh air circulate.

Summary of Holiday Heating Tips

So, there you have it! We’ve covered the nuts and bolts of keeping your home toasty during the holiday season, with our 24/7 Help. From furnace maintenance to window sealing, our Heater Services cover all bases. We offer comprehensive HVAC Services, which include thermostat use, insulation, and humidifiers. Our Heating Services ensure fireplace safety, while our Heating Repair team is always ready for any challenges. Now it’s up to you to put these Installation Guide tips into action. Don’t just sit there shivering like a penguin in a snowstorm; take charge with 24/7 Help and make your home a warm haven this holiday season.

Remember, being energy efficient is not just about saving money (though who doesn’t love that?), but also about embracing a sustainable lifestyle. So go ahead, apply these tips and let’s toast (pun intended) to a warm and eco-friendly holiday season.

FAQS

What can I do if my furnace isn’t heating properly?

Check if your AC repair includes correct thermostat settings and ensuring that the air filters are clean. If the issue with your furnace or air conditioner continues, consider calling a professional for a Furnace Repair, Air Conditioner Fix, Furnace Fix, or Heating Repair inspection.

How do I seal my windows effectively for winter?

Use weatherstripping or caulk around the edges of your windows to prevent cold drafts from entering your home.

What temperature should I set my thermostat at during holidays?

The optimal temperature setting depends on whether you’re at home or away. Generally speaking, 68°F when you’re at home and awake, and lower when you’re asleep or away is considered energy efficient.

Is attic insulation really necessary?

Absolutely! Attic insulation plays a crucial role in preventing heat loss from your home during winter.

Should I use whole-home humidifiers or single room ones?

Whole-home humidifiers work best for maintaining consistent humidity levels throughout the house whereas single-room ones are ideal if only certain rooms need additional moisture.

How can I safely use my fireplace during holidays?

Ensure that your chimney and duct are clean before lighting any fires or performing duct cleaning. Always use a screen in front of the fireplace to prevent sparks from flying out and keep flammable items at a safe distance.

Your furnace filter, the unsung hero of your HVAC system, along with the thermostat and blower motor, works tirelessly to keep your indoor air clean and your heating system running smoothly. This article frames their importance in maintaining a well-functioning system. But like any hero, it needs a little upkeep. Changing your furnace filters, as this HVAC article suggests, isn’t just about improving air quality or boosting your thermostat’s efficiency – it’s also about extending the life of your blower motor and even avoiding a call to an air conditioning specialist through the door. This post will guide you through the surprisingly straightforward process of replacing air filters and the thermostat, ensuring that you can maintain optimal performance from your HVAC system without breaking a sweat. As an air conditioning specialist, you’ll also learn about the blower motor replacement and cooling innovations for enhanced efficiency.

Importance of Changing Your Furnace Filter

Maintaining your air filters in your HVAC system, particularly the furnace filter, is crucial. This AC repair job is best left to an HVAC advice specialist, proficient in cooling services and AC installation, to cover. Your HVAC system’s efficiency gets a boost when you maintain your furnace filters, improving indoor air quality and dodging hefty repair bills. A good tip is to regularly check the panel for any issues, utilizing 24/7 Help if needed.

Boosts Efficiency and Lifespan

Your Heating & Cooling system, including the furnace and air filters, is like the heart of your home; it keeps everything warm and cozy. Heater Services and Heating Services ensure this vital system remains in top shape. Just a door away, an AC Repair specialist ensures the optimal operation of your Heating & Cooling system, providing top-tier HVAC Services and Cooling Services. But if you let the door and panel filters on your Victor model get all clogged up, you’re basically choking it out. Imagine trying to breathe with a furnace filter or panel over your mouth – not fun, right? That’s what happens to your furnace when the airflow gets blocked by dirty filters.

Regularly changing these filters ensures smooth sailing for the air through your furnace repair system, allowing for efficient furnace fix and optimal moisture control. The result? Your furnace doesn’t have to work overtime, enhancing its overall efficiency and lifespan.

Improves Indoor Air Quality

We all love fresh air, don’t we? Well, guess what? Your furnace filter plays a big role in that too!

Every time you crank up the heat, air cycles through the furnace filters in your house along with any dust or allergens present in it. A clean furnace filter, much like a thorough duct cleaning, acts like a bouncer at this party – only allowing clean air to pass while trapping those pesky particles.

So next time you take a deep breath indoors and feel refreshed – thank those hard-working furnace filters, clean air ducts, air cleaners and your air purification system!

Prevents Costly Repairs

Let’s face it – no one likes unexpected bills! Especially not when they’re due to something as mundane as forgetting to change a filter.

A dirty or clogged filter can cause serious damage to your heating system, leading to costly furnace fix, repairs, or even replacement. Think about the pros and cons: would you rather spend some bucks now on a new filter, or shell out big money later for an entirely new heating system?

Identifying the Right Time for Replacement

Heating Performance Decline Signals Change

Your furnace is like a loyal friend. It keeps your house warm and comfy, especially during those chilly winter nights. But just like any other friend, it needs some TLC from time to time.

One of the first signs that it’s crying out for help is a decline in heating performance. You might notice, despite your heating tips, that your home isn’t as toasty as before or that it takes longer to heat up, indicating potential heating repair needs. These could be furnace replacement signs, warranting professional heating services. This could be due to a dirty or clogged filter blocking the flow of air.

Dirt Accumulation Calls for Action

Another telltale sign that you need a new furnace filter is dirt accumulation. Just pop open the door of your furnace and take a gander at the filter. If you see more dirt than filter, then it’s high time for replacement.

Don’t forget to snap a quick photo of the dirty filter with your phone. This Installation Guide will serve as a handy reference when shopping for a new one.

Manufacturer’s Schedule Guides Replacement

Lastly, always adhere to the manufacturer’s recommended replacement schedule. Most manufacturers suggest changing filters every year or so, but this can vary depending on usage and other factors such as pets in the house or allergy sufferers.

Remember, replacing your furnace filter regularly not only ensures optimal heating performance but also prevents nasty stuff like mold from taking up residence in your home.

Here are some steps on how to change your furnace filter:

  1. Turn off power supply
  2. Open access panel/door
  3. Remove old filter (use photo as reference)
  4. Slide new filter into place (follow arrows on frame)
  5. Close panel/door

Different Types of Furnace Filters

Disposable Fiberglass, Pleated, and Electrostatic Filters

First off, let’s chat about the different types of furnace filters. In your bedroom closet furnace, you have options like disposable fiberglass ones, pleated versions, and electrostatic filters.

Disposable fiberglass filters are like the rookies in a sports team. They’re cheap and provide a Quick Response, but don’t expect them to catch everything. These bad boys only trap the largest particles.

On the other hand, you’ve got pleated filters. Think of these as the seasoned pros. They cost a bit more but they can trap smaller particles than their fiberglass counterparts.

Then there’s electrostatic filters. These are like your all-star players. They use static electricity to attract even tiny particles like dust mites or smoke.

Understanding MERV Ratings

Now let’s break down this thing called MERV ratings. MERV stands for Minimum Efficiency Reporting Value. It’s basically a score that tells you how good a filter is at trapping stuff.

A higher MERV rating means better filtration but it also means more resistance to airflow which can stress out your furnace system if it’s not designed for it.

Reusable Vs Disposable Filters

When choosing between reusable and disposable filters, there’s a lot to consider.

Disposable filters are easy peasy – use ’em once then toss ’em out when they’re dirty. But if you’re environmentally conscious or want to save some dough in the long run, reusable might be your jam.

Reusable filters can be cleaned and reused (hence the name). But remember cleaning them is another chore on your list!

Step-by-Step Guide on Filter Change

Tools and Safety First

Switching out your furnace filter isn’t rocket science, but it’s not a walk in the park either. You gotta have the right tools and Emergency Services safety measures in place before you dive in.

So, what do you need? A new filter for sure, maybe a pair of dehumidifiers, a pair of gloves to protect your hands from dust and grime, and a flashlight if your furnace or dehumidifiers are tucked away in some dark corner.

Remember folks, safety first! Always turn off your furnace before starting. We don’t want any nasty surprises now, do we?

Removing The Old Filter

Time to get down to business. First up: removing the old filter.

Locate your furnace’s service panel for heater services; it should be pretty easy to spot during HVAC services or heating repair. Pop that sucker open (it usually just slides or swings open) and you’ll see the old filter inside.

Take note of how the filter sits inside its housing. There’s usually an arrow on the edge indicating airflow direction – it’s important for later!

Gently slide out the old filter. Be careful not to let any dust or debris fall into the furnace while doing this.

Installing The New Filter

Alright, out with the old, in with the new!

Grab your new filter (make sure it’s the correct size!) and slide it into place where the old one used to be. Remember that arrow I mentioned earlier? Make sure it’s pointing towards the furnace – that’s where air flows from!

Push it all way until it fits snugly within its housing. No room for loose filters here! Close up your service panel once you’re done.

Post-Replacement Checks

Job well done! But hold on, we’re not finished yet.

Turn on your furnace and let it run for a bit as part of your heating tips regimen. Listen for any unusual noises – rattling or whistling can indicate a poorly fitted filter.

Check your furnace’s performance over the next few days. If it’s running smoothly and your home feels warm and toasty, give yourself a pat on the back – you’ve successfully changed your furnace filter!

Tips for Simplifying Furnace Filter Change

You’ve got your furnace filter in hand, ready to make the swap. But how can you make it a smoother process? Let’s dive into some tips that can simplify your furnace filter change.

Track Your Last Replacement Date

Remembering the last time you changed your furnace filter isn’t always easy. It’s like trying to recall what you had for lunch two weeks ago on Tuesday. Not so simple, right?

But here’s an air conditioner fix hack: jot down the date of replacement on a sticky note and slap it on the unit. This way, with a Quick Response, you’ll never forget when it’s time for a change-out.

  • Pros: Helps maintain optimal furnace performance.
  • Cons: Requires regular monitoring.

Use Correct Filter Size and Type

Just like Cinderella’s glass slipper fit only her foot perfectly, each furnace has a specific filter size and type that fits just right. Now, if you’re wondering where to find this info, check your current filter or refer to the user manual or the installation guide.

  1. Measure your existing filter – length, width, and thickness.
  2. Match these dimensions with new filters available in stores or online.

Remember, using an incorrect size or type can cause more harm than good!

  • Pros: Ensures efficient functioning and longevity of your furnace.
  • Cons: Might require some research initially.

Dispose Used Filters Responsibly

We all love Mother Earth, don’t we? So why not do our bit by disposing used filters responsibly?

Most filters are made from cardboard and fiberglass which are recyclable materials. However, they also trap dust particles and allergens making them unfit for recycling directly.

Here’s what you can do:

  1. Check if there are any local recycling programs accepting old filters.
  2. If not possible to recycle directly, try separating the recyclable parts from non-recyclable ones before disposal.

Doing this small act can go a long way in reducing environmental harm.

  • Pros: Contributes to environmental conservation.
  • Cons: Can be time-consuming.

Assessing the Effectiveness Post-Change

Managing to get that pesky furnace filter changed, as well as an Air Conditioner Fix, is a victory in itself. But how can you tell if it’s really doing its job?

Monitor Your Energy Bills

The first sign of a necessary furnace replacement often mirrors the signs of an effective filter change, and is frequently visible in your energy bills. An air purification process, involving duct cleaning and using air cleaners, allows your furnace to run more efficiently with a fresh, clean filter. This efficiency should translate into lower energy costs.

For example, let’s say last month you were shelling out a hefty $200 on heating. After changing the filter, this month’s bill drops to $180. That’s a 10% savings! While the pros and cons may not seem like much at first glance, over time these savings can really add up.

Check Airflow from Vents

Next up is checking the airflow from your vents. If air is flowing freely and feels warmer than before, it’s a good sign that your new filter is working properly.

To test this, place your hand near one of the vents in your home while the furnace is running. You should feel a consistent flow of warm air coming out. If it feels weak or inconsistent, there might be an issue with the new filter or another part of your heating system.

Observe Dust Levels around Home

Lastly, keep an eye on dust levels around your home after changing the filter. A reduction in dust indicates better air filtration.

Have you ever noticed those annoying dust bunnies multiplying under furniture or along baseboards? Or maybe a thin layer of dust coating surfaces shortly after cleaning? These are signs that your old furnace filter wasn’t doing its job effectively.

After installing a new filter, give it some time and see if there’s less dust settling around your home. If so, congrats! Your new furnace filter has improved air quality, offering an effective IAQ (Indoor Air Quality) Improvement by trapping more airborne particles, a simple yet vital aspect of IAQ Solutions.

Key Takeaways on Furnace Filters

Changing your furnace filter is no rocket science, but it’s undoubtedly a game-changer for your home’s air quality and energy efficiency. We’ve walked you through the why’s and how’s, from understanding its importance to mastering the art of changing them like a pro. Now it’s over to you! This AC repair job is best left to an HVAC advice specialist, proficient in cooling services and AC installation, to cover. Ensure clean air ducts. Keep that bad boy clean and efficient.

Remember, consistency is key here. It’s not just about changing the filter once and forgetting about it. Regular checks will ensure your furnace keeps humming along nicely without any hiccups. So, roll up those sleeves and get cracking! Your furnace (and wallet) will thank you.

FAQs on Furnace Filters

How often should I change my furnace filter?

Typically, it’s recommended to change your standard 1-inch thick furnace filters every 30-90 days depending on usage and air quality in your home.

What happens if I don’t change my furnace filter?

Neglecting to change your filter can lead to poor air quality, higher energy bills, and potential damage requiring furnace repair due to your HVAC system overheating.

Can I clean my furnace filter instead of replacing it?

Some types of filters are reusable and can be cleaned instead of replaced. However, most common filters need to be replaced regularly for optimal performance.

What type of furnace filter should I buy?

The best type depends on your specific needs such as allergies or pets in the house. Pleated filters generally offer a good balance between cost and performance.

Is a more expensive furnace filter worth it?

More expensive filters usually have higher MERV ratings indicating better filtration efficiency. If improving indoor air quality is a priority for you, investing in a high-quality filter may be worth considering.

©2024 Champion Services All Rights Reserved